👟 Welcome to Crocsy Vibe – Where Comfort Meets Global Style! 🌈

DIY Jibbitz Magic – Create Your Own Custom Charms From Scratch
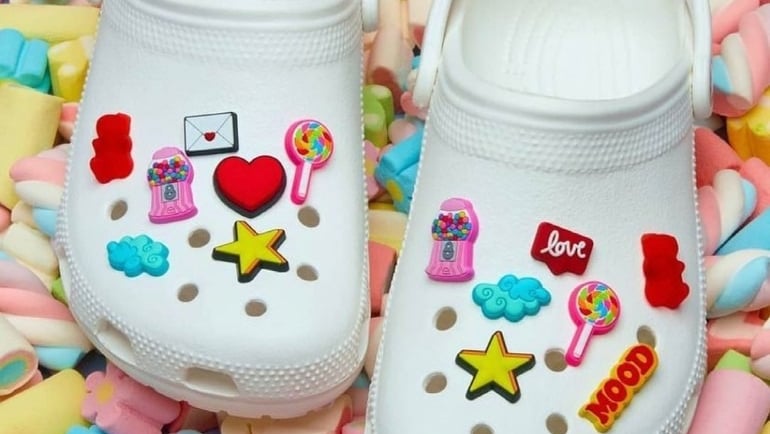
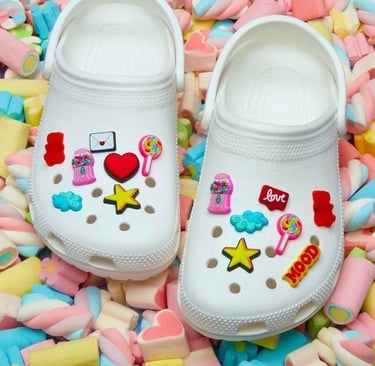
🎨✨ Create Your Own Jibbitz! Want charms nobody else has? Learn how to make your own Jibbitz using resin, polymer clay, or 3D printing. From cultural symbols to neon initials, bring your imagination to life and customize your Crocs with DIY flair.
SHARAD RAJGURU
7/19/20258 min read
Introduction
Customization serves as a powerful avenue for individuals to showcase their unique personalities and interests. In the realm of fashion accessories, few items allow for such a personal touch than Jibbitz charms. Originally designed to enhance Crocs footwear, Jibbitz has evolved into a popular form of self-expression. This blog post aims to explore the exciting possibility of creating your own Jibbitz charms from scratch, using cost-effective materials readily available to most crafters.
The crafting process of custom Jibbitz is not just an enjoyable activity; it also fosters creativity and encourages individual expression. By designing charms that embody personal style, interests, or memorable experiences, each piece becomes a reflection of the creator. This unique aspect allows individuals, especially children and adults alike, to tell their stories through the accessories they wear. Whether it's a charm representing a favorite hobby, an important milestone, or simply a favorite color, the customization process can transcend mere decor, becoming a meaningful part of one’s identity.
Moreover, crafting your own Jibbitz can be an incredibly satisfying endeavor. It involves working with a range of materials, including clay, resin, or even upcycled household items. These options not only keep the costs manageable but also invite resourcefulness in the crafting process. As this blog delves deeper into the methods and materials for creating personalized Jibbitz charms, readers will discover the ease and joy of producing unique pieces that resonate with their personal styles.
Ultimately, the journey of crafting Jibbitz charms stands as a testament to creativity and individuality. This blog post will serve as an informative guide, helping you embark on your custom charm-making adventure with enthusiasm and confidence.
Materials You'll Need
Creating your own custom Jibbitz requires a selection of materials that can help you achieve the desired effects and finishes. The three primary materials you will need include epoxy resin, polymer clay, and 3D printing tools. Each of these materials offers unique advantages, making them suitable for various design elements in your Jibbitz creation process.
Epoxy resin is a versatile medium that can provide a glossy and durable finish to your charms. One of the benefits of using epoxy resin is its excellent adhesive properties, making it ideal for attaching different components securely. It is also waterproof and heat-resistant. When working with epoxy resin, ensure that you follow safety guidelines by using gloves and working in a well-ventilated area. Additionally, using colorants or glitter can enhance the aesthetic appeal of your designs.
Polymer clay serves as another excellent option for those who enjoy sculpting their charms from scratch. This material is easy to mold and shape, allowing for intricate designs and personalized features. It is available in a wide variety of colors, making it simpler to blend and create unique combinations. Once molded into your desired form, polymer clay typically requires baking in an oven to harden it for durability. This material is particularly advantageous for creating detailed pieces, but ensure that you follow the manufacturer's instructions for temperature and baking times.
Lastly, 3D printing provides an innovative approach for creating customized Jibbitz. With the aid of design software, you can create intricate shapes and models tailored to your personal style. 3D printing allows for precision and the ability to experiment with more complex designs that might be difficult to achieve through traditional molding techniques. For novices, several online platforms offer user-friendly templates and guidelines for successful outcomes. By utilizing these materials, you can embark on your crafting journey with confidence, knowing you have everything you need for creating personalized Jibbitz charms.
Designing Your Charms
When embarking on the journey of creating custom Jibbitz charms, the first essential step is the design process. This involves brainstorming and sketching ideas that reflect your unique personal style. Begin by considering what inspires you; it could be anything from your favorite hobbies, nature, or even specific colors that resonate with your aesthetic. Inspiration can also stem from trends in fashion or popular culture, so it is beneficial to remain observant and open to ideas from various sources.
Once you've gathered insights and inspiration, it’s important to convert those ideas into tangible designs. Start with simple sketches to visualize how the charm could look. This stage allows for experimentation with shapes, sizes, and details. Consider the form that suits your vision — whether it’s whimsical, elegant, or avant-garde. You might find it helpful to categorize your designs based on themes, such as animals, symbols, or abstract shapes. Utilizing these themes not only organizes your ideas but can also spark further creativity during the design process.
An effective way to enhance your creativity is to engage in mood boarding. Collect images, colors, and materials that reflect the vision you have for your charms. This visual collection serves as a source of motivation and reassurance as you continue to develop your designs. Remember to keep personal style as a guiding principle throughout this process, as it ensures that the final products authentically represent you.
By investing time to thoughtfully plan and sketch your design ideas for custom Jibbitz charms, you increase the likelihood of crafting a unique and meaningful accessory that resonates with your individuality. The preliminary design process is not merely a formality; it is the foundation upon which your creative expressions will be built, ultimately leading to the crafting of custom charms that are both beautiful and representative of your personal flair.
Making Charms with Epoxy Resin
Creating custom Jibbitz charms using epoxy resin is an exciting and creative process that allows enthusiasts to design personalized accessories for their footwear. To begin, gather all necessary materials, including epoxy resin, hardener, pigments or dyes for coloring, silicone molds, disposable cups for mixing, and stir sticks. It is also essential to have safety gear, such as gloves and a mask, to ensure a safe crafting experience.
The first step involves preparing your silicone molds. Make sure the molds are clean and free from dust or debris to achieve a perfect finish. If desired, you can apply a mold release spray to facilitate easy removal once the charms are cured. Next, measure and mix the epoxy resin and hardener according to the manufacturer's instructions. Typically, a ratio of one part resin to one part hardener is standard, but it's crucial to verify specifics from your product's packaging.
Once the resin and hardener are mixed thoroughly, you can add any pigments, glitter, or other decorative elements to achieve the desired look. Stir the mixture well to distribute the colors evenly throughout. After this, carefully pour the resin mixture into the silicone molds, filling each cavity without overfilling to avoid a mess. It's advisable to work slowly during this stage to minimize bubbles forming in the resin. If bubbles do occur, a heat gun or a small torch can be used gently over the surface to help eliminate them.
After pouring, allow the charms to cure according to the recommended time in a dust-free environment. This process can take anywhere from 24 to 72 hours, depending on the resin type. Once fully cured, carefully remove the charms from the molds to reveal glossy, durable pieces ready for use. By following these steps, anyone can create beautiful Jibbitz charms that showcase individual creativity and style.
Crafting with Polymer Clay
Polymer clay is an incredibly versatile medium that allows crafters to unleash their creativity when designing custom charms. To begin, ensure you select a quality polymer clay that is easy to work with and available in a variety of colors. The first step is kneading the clay; this process is essential as it softens the material, making it more pliable for shaping. Knead the clay thoroughly between your fingers until it reaches a smooth and uniform consistency.
Once the clay is adequately softened, the next phase is shaping. Start by breaking off a small piece of the polymer clay for your desired charm size. Craft your desired shape, whether it's a simple geometric figure, a fruit, or even a whimsical character. For more intricate designs, consider using sculpting tools or household items such as toothpicks or the back of a paintbrush to add details and textures.
Adding color and details can significantly enhance the appearance of your charms. You may blend different colors of clay together to create gradients or marbled effects. Another technique involves using paint or colored powders, such as mica, to paint on after baking, which can add sparkle or vivid hues. Keep in mind that polymer clay often appears slightly different once baked, so always perform baking tests with small bits of clay first.
After crafting and detailing your charms, it is time to bake. Follow the manufacturer’s instructions for the correct temperature and duration, usually around 265°F to 275°F (129°C to 135°C) for 15-30 minutes, depending on the thickness of your pieces. Once baked, allow your creations to cool completely. For added durability, consider sealing your charms with a clear glaze or varnish that is suitable for polymer clay, ensuring your custom designs stay vibrant and protected over time.
Creating Designs with 3D Printing
3D printing has emerged as a revolutionary method for crafting precise and intricate Jibbitz charms tailored to individual preferences. This innovative technology utilizes computer-generated 3D models, allowing you to create customized designs with relative ease. To begin, one must understand the basics of 3D modeling, which typically involves using specialized software such as Tinkercad, Fusion 360, or Blender. These programs enable users to design 3D objects by manipulating geometric shapes and applying textures and colors that align with their vision.
Once the design process is complete, the next step involves preparing the model for printing. This is accomplished through slicing software, which converts the model into a format compatible with 3D printers. It generates the necessary G-code that guides the printer in creating the object layer by layer. Selecting the right 3D printer is essential, as different types vary in resolution, speed, and capabilities. For Jibbitz charms, a filament-based printer (FDM) is often suitable due to its affordability and range of material options.
Regarding materials, PLA (Polylactic Acid) is one of the most commonly used filaments for 3D printing Jibbitz charms. It is user-friendly, biodegradable, and available in countless colors, making it a perfect choice for creating vibrant and personalized charms. Once your charm is printed, post-processing steps such as sanding and painting may be needed to enhance the final look. This stage allows for the removal of imperfections and the addition of personal touches to achieve a polished finish. By understanding these fundamental aspects of 3D printing, you can create unique Jibbitz designs that reflect your originality and style.
Finishing Touches and Personalization
Once you have crafted your Jibbitz charms, the final step is to add finishing touches and personalize them. This stage is crucial, as it not only enhances the aesthetic appeal of your charms but also allows you to infuse your unique style and creativity into each piece. Applying a suitable finish can elevate the look of your charms, providing a polished and professional appearance. Consider using a clear coat sealant to protect the colors and design, ensuring longevity and vibrancy of your custom charms.
In addition to sealing your work, adding hooks or accessories can bring your creations to life. You can choose from a variety of embellishments, such as beads or small charms, to complement the design of your Jibbitz. By incorporating these elements, you can create a more dynamic and eye-catching accessory. Attaching a clasp or loop can also make it easier to attach your finished charms to shoes, bags, or keychains, enhancing their utility and enjoyment.
Personalization is key to making your Jibbitz truly one-of-a-kind. Consider your interests, hobbies, or favorite colors when designing your charms. You might want to create a theme, such as nature, travel, or your favorite pop culture icons. This thematic approach not only showcases your creativity but also tells a story through the charms that you display. Engage in this process with an open mind, allowing your imagination to guide you in creating pieces that genuinely reflect your personality.
As you finish your custom Jibbitz, take a moment to appreciate the effort and creativity you have poured into each design. These personal touches will ensure that your charms stand out and embody your unique style. Take pride in showcasing your finished pieces, sharing them with friends and family, and celebrating your artistic vision.

Get in touch
Address
3721 Single Street
Quincy, MA 02169
Contacts
123-456-7890
info@email.com